This blog shows how to setup a React JS app with a Rails 7 API and how it communicates with the api to display the Books data on the UI.
Step 1. First lets create a rails api only application
rails new bookstore --api
This way it doesnt create views etc.
Step 2. Update Gemfile
Check rails version to be ~7.0.0 and Ruby ~3.0.0. Now un-comment or add these lines to whitelist frontend react application to access our api that other people cant for security.
gem 'rack-cors'run bundle to install.
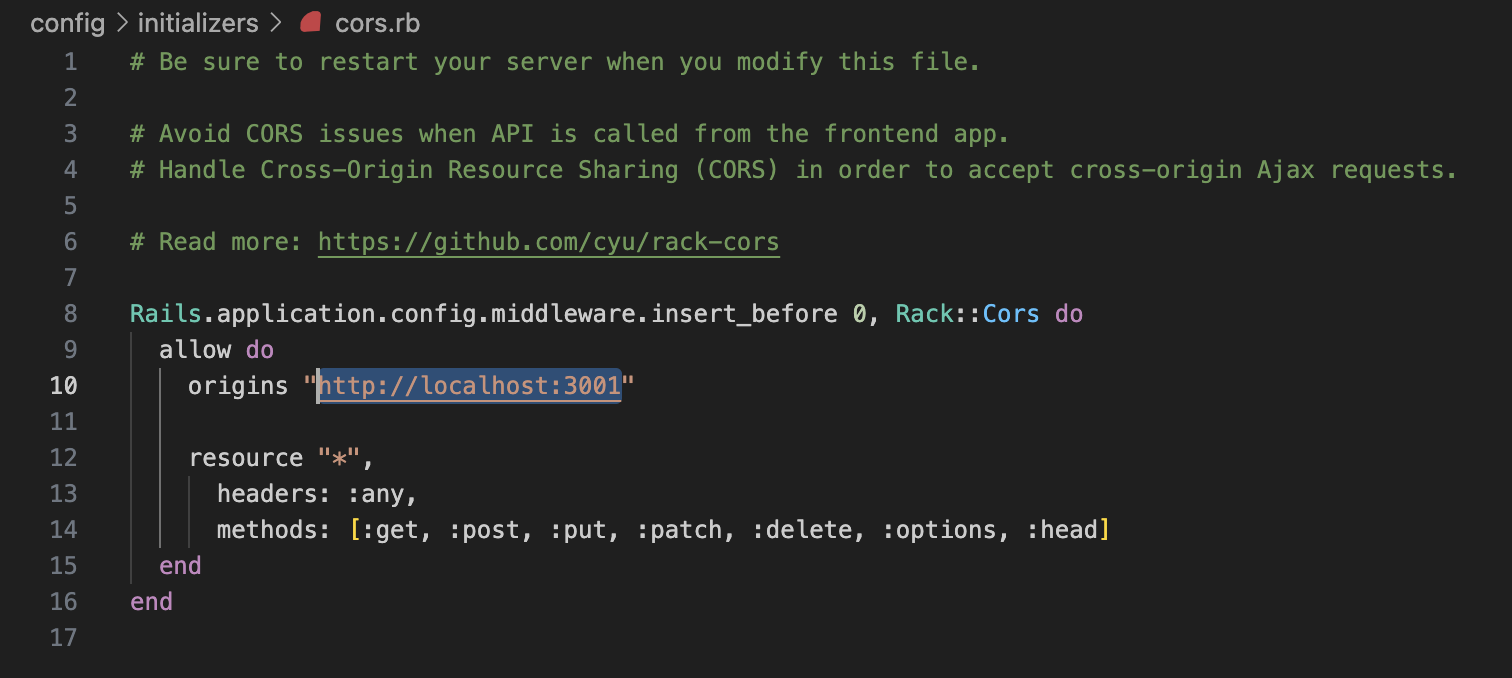
Similarly, update config/initializers/cors.rb origins with the url for whitelisting. You can add * to whitelist all URLs or add your react server URL.
Step 3. Create a Book scaffold with a Title and Body.
Run command rails g scaffold book title: string body: text – verify controller, model and the db migration file generated. By default it should also create the CRUD methods inside controller with json response.
rails db:migrate – to setup db
Step 4. Update Routes
It’s good to have a versioned api namespace so I updated routes.rb file this way.
  Rails.application.routes.draw do
    namespace :api do
      namespace :v1 do
        resources :books
      end
    end
  end
You have to move your books_controller.rb file into a new folder controllers/api/v1 and update the namespace like class Api::V1::BooksController
Step 6. Create Books Data in DB.
Open Rails console from terminal and create data. (Pre-requesite: Setup MySql on your machine.)
rails c – should open rails console
Book.create!([
{ title: 'First Book', body: 'Hello book world!' },
{ title: 'Second Book', body: 'Hello sir!' }
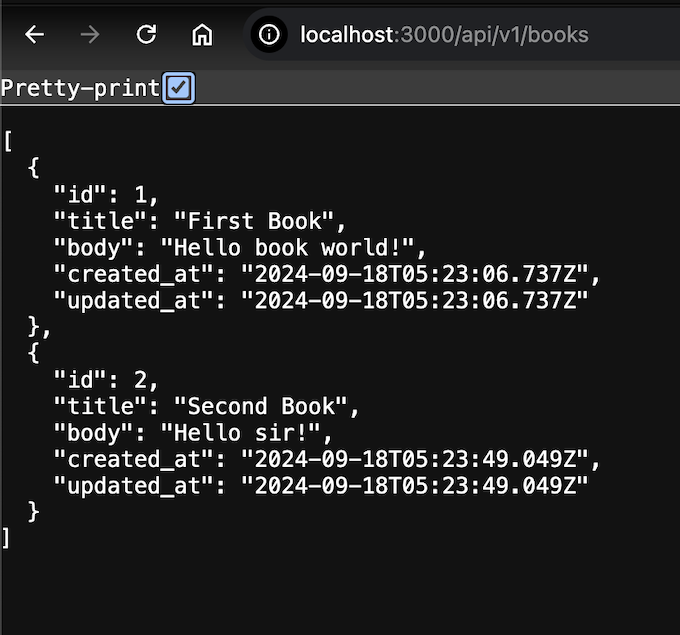
])Now you have 2 Books in the table. Can verify in browser by accessing http://localhost:3000/api/v1/books. You should be able to see json data for both books you created.
Now that we are good with our API. Let’s create the React app!
Step 5. Create React App
npx create-react-app bookable – should create a bookable folder under bookstore.
npm run start – start the server. Use another port. It’s 3001 for me. You should be able to see your React app running on this port. Awesome!! Now let’s do some changes to display book data on the UI.
Note: To only test React app integration you can just update App.js file with the code below. This will just display Hello World! You can see our React app is already setup. To see how to load Books Data, move to the next steps!
import './App.css';
function App() {
  return (
    <div className="App">
      <h1> Hello World!</h1>
    </div>
  )
}

export default App;

Step 6. Update bookable/src/App.js to show Books data
import './App.css';
import axios from "axios";
import Books from './components/books';
import { useEffect, useState } from 'react';

const API_URL = "http://localhost:3000/api/v1/books";

async function getAPIData() {
  const response = await axios.get(API_URL);
  return response.data;
}

function App() {
  const [books, setBooks] = useState([]);

  useEffect(()=> {
    let mounted = true;
    getAPIData().then((items) => {
      if (mounted){
        setBooks(items);
      }
  })
  return () => {mounted = false} ;
}, []);

  return (
    <div className="App">
      <h1>Hello</h1>
      <Books books = {books}></Books>
    </div>
  );
}

export default App;
Step 7. Create a Books component.
Create a new folder ‘components’ under bookable/src. And create a Books.js file in it. Update code as below.
import React from 'react'
function Books(props) {
return (
<div>
<h1>These books are from the API:</h1>
{props.books.map((book)=> {
return (
<div key={book.id}>
<h2>{book.title}</h2>
<p>{book.body}</p>
</div>
);
})}
</div>
)
}
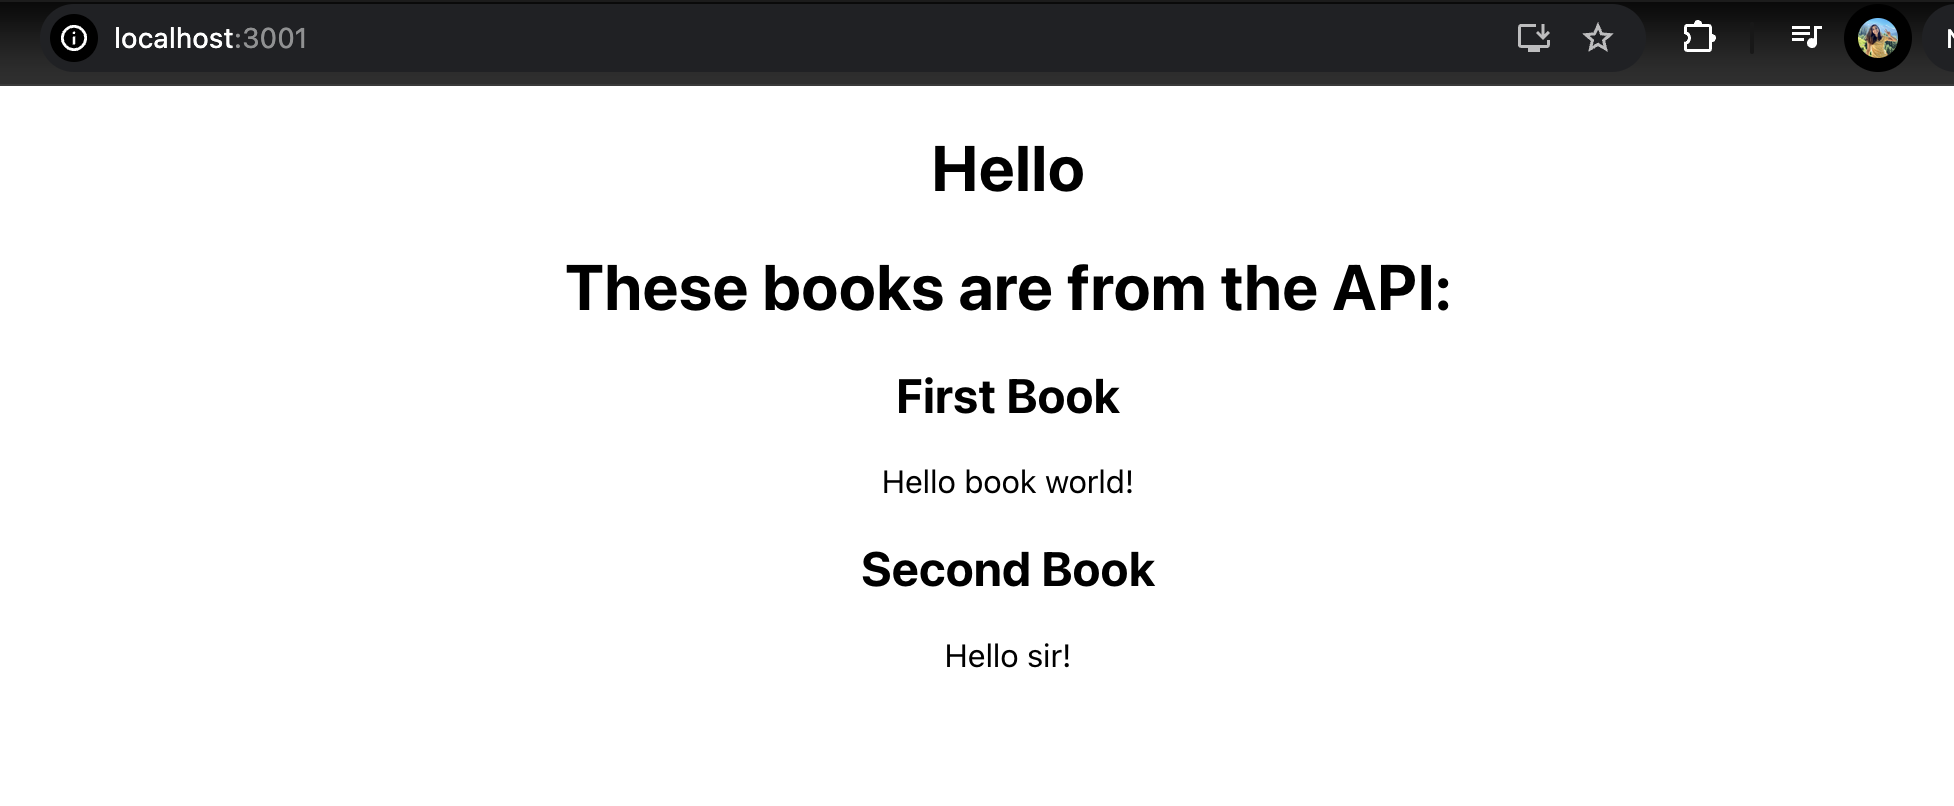
export default BooksAs the app is running you should be able to see the books data on the UI on http://localhost:3001.
Congrats! Here you have your fully integrated React JS and Ruby on Rails 7 application! To understand the react concepts like useEffect, useState follow the official React Documentation. I will be explaining more concepts like Axios, Redux etc in further blogs. Have a good day!
Tutorial credits - Deanin